Tutorial
In this tutorial we describe how to load FLIM data, correct for motion and save the realigned data using Galene. Please also see the video tutorial.
Loading and opening data
- Select a folder containing your data using File>Open…
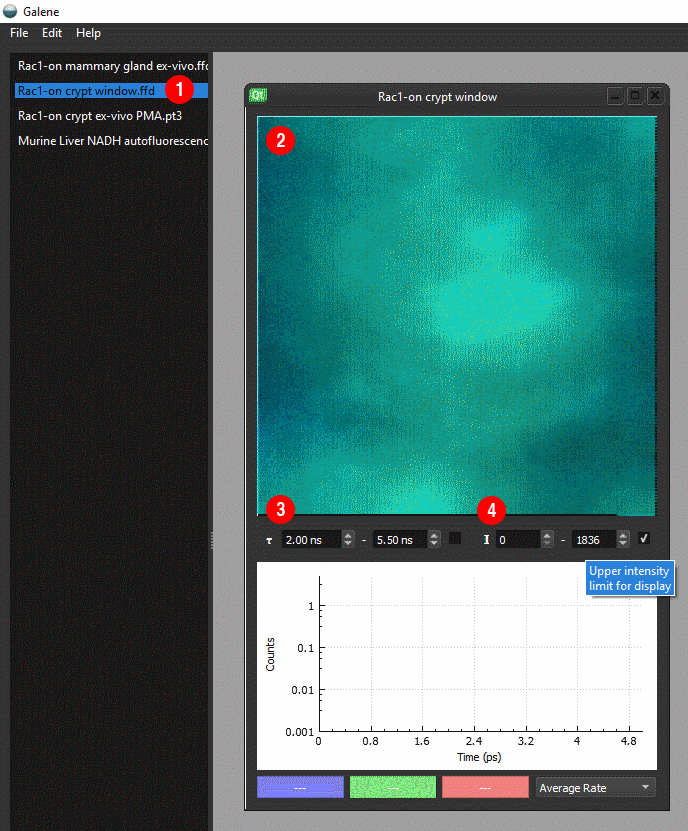
- Double click on an image from the list to open ①
- An intensity mapped FLIM image will open the workspace ②
- Control the lifetime ③ and intensity ④ limits using the options below the image
Correcting for motion
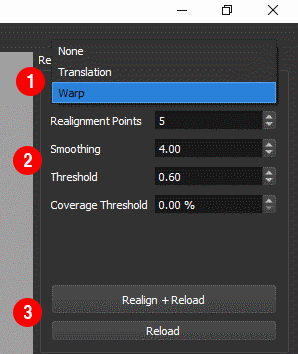
- Select the
Warpmotion compensation ① approach using the drop down menu on the right
Tip
The Warp motion compensation mode takes the microscope scan pattern into account
and in most cases is the best option.
For more about the correction modes and
the options available ② see Correction Modes
- Align the data using the
Realign + Reloadbutton ③
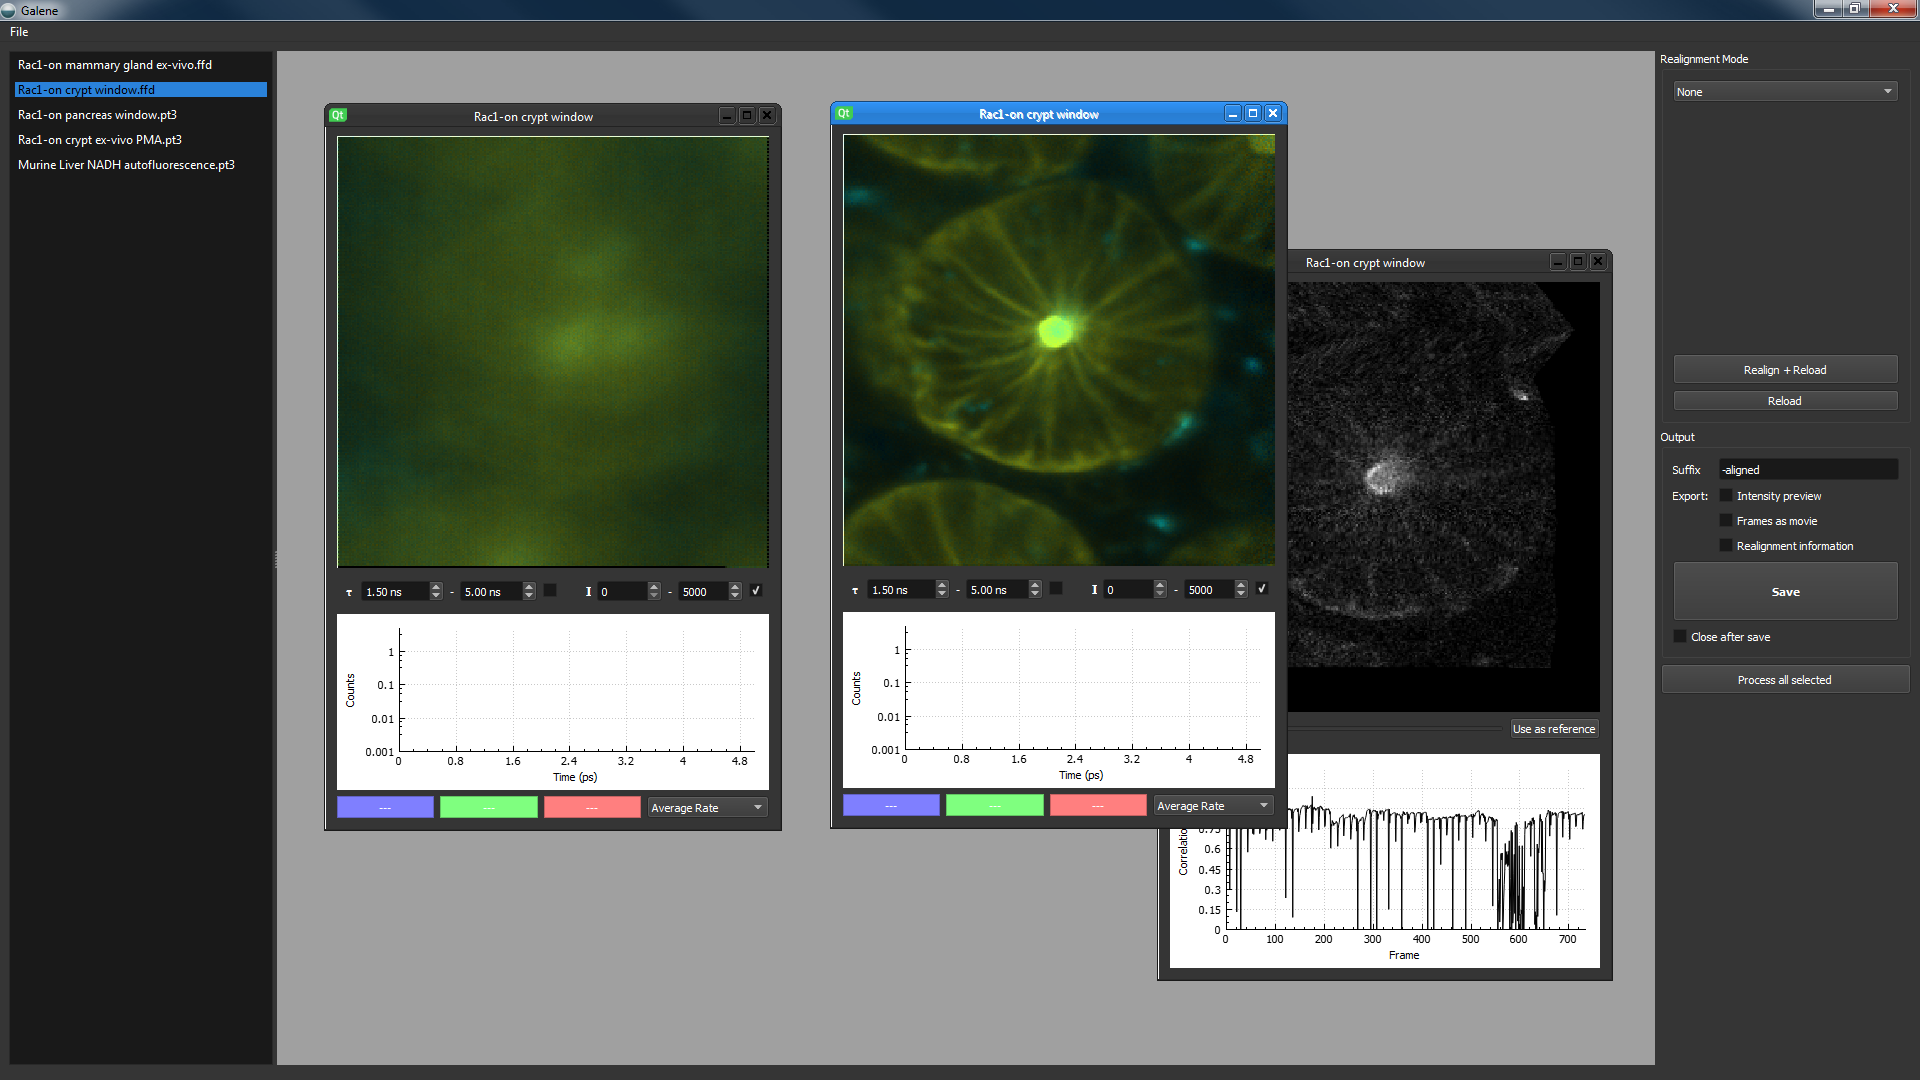
Viewing the realignment results
- The realigned FLIM image ① is shown alongside the individual intensity frames ②.
- Scroll ③ through the aligned or unaligned frames using the
Abutton ④ in the realignment window. - By default the first frame will be used as the reference. To select a different frame, press
Use as referencebutton ⑤ and realign the data using the Realign + Reload button. - The graph below shows the correlation between the realigned frame and the reference frame in black and the correlation between the unaligned frame and the reference frame in red.

Optimising the realignment results
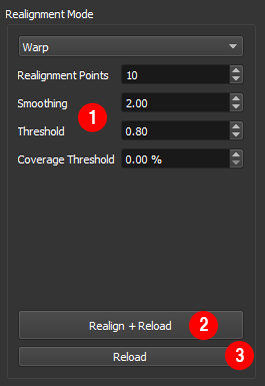
If the realignment results are not satisfactory, the following parameters can be adjusted ①
Realignment Pointscontrols the number of points in the image used to estimate the displacement during each frame. We have found that the default value of 10 points provides good results across a range of images. If the motion is fast relative to the frame you may need to use more points to accurately estimate the motion. If the realignment appears ‘jittery’, try using fewer points. If the displacement during each frame is relatively small as few as 4 points may be sufficient.Smoothingcontrols the degree of smoothing in the x-axis applied to the image before realignment. Increasing the degree of smoothing can improve the realignment when the signal to noise in each frame is low.
- After adjusting these settings, realign the data using
Realign + Reload②.
Frames which are not well aligned, for example if the sample moves out of the field of view, can degrade the final image. These frames can be rejected by applying thresholds to the realignment results
- Use
Correlation Thresholdto reject frames where the correlation with the reference frame is low. - Use
Coverage Thresholdto reject frames where the displacement was very large. - Apply the thresholds without reprocessing the data by pressing
Reload③ .
- Use
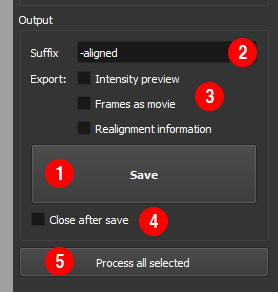
Saving the realigned data
When you are happy with the realignment, press
Save① to save the data as a histogrammed .ffh file. These can be read directly by FLIMfit or into Matlab using the FlimReaderMex fileYou can also output diagnostics about the fitting ②:
Intensity preview: save a png of the intensity of the realigned image. This is convenient for quickly assessing which files have been successfully realigned.Frames as movie: save a tif stack of the aligned and unaligned frames for diagnosticsRealignment information: save a csv file with the estimated displacements across the frames
To process several files using the same settings, select multiple files and click
Process all selected⑤.